I noticed in the previous assignment (Desert Mapping) that a lot of people were either having a hard time with cliffs, or they just didnt know how they were supposed to look.
So, I decided to make a short tutorial on how I go about making my maps, and how I put detail into them, so that others might be able to learn.
This will not only cover cliffs, but several other features of the Mountain tileset from the RTP as well (such as stairs, caves, trees, etc..)
Okay, with that said, lets begin!
Hmm, where to begin...
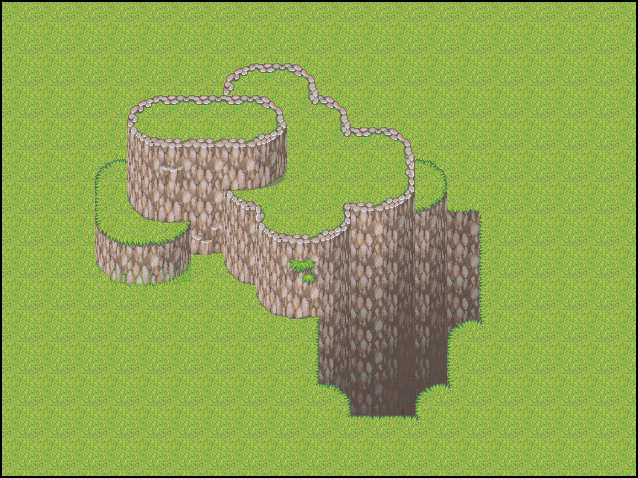
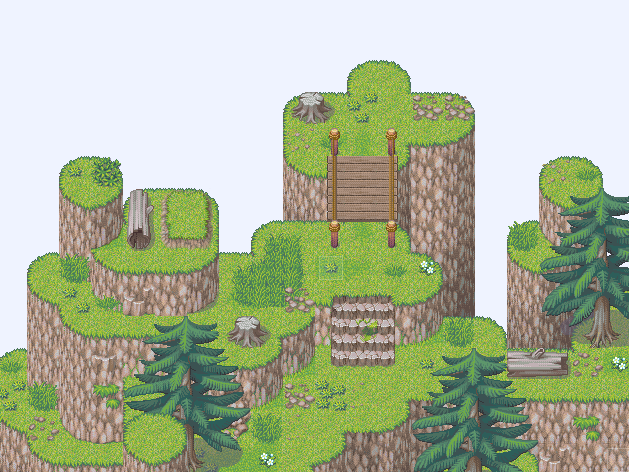
This map here shows the several things that you can do with the Mountain tileset's cliff tiles. There are cliffs, as well as the tiles that get darker towards the bottom (as in they are going down into a canyon)
This picture shows several ways that you can kinda layer the cliffs. The smaller cliff that is sticking out to the left is what I call a "kicker" cliff, meaning a smaller one. I advised lots of people to try and put these into their maps in the last assignment, and I was not sure if everyone understood what they were.
They are made by placing the lower (kicker) cliff in the first layer (erasing the other cliff which is already there) and then placing several of the curved bottom tiles over it in the second map layer.
------------------------
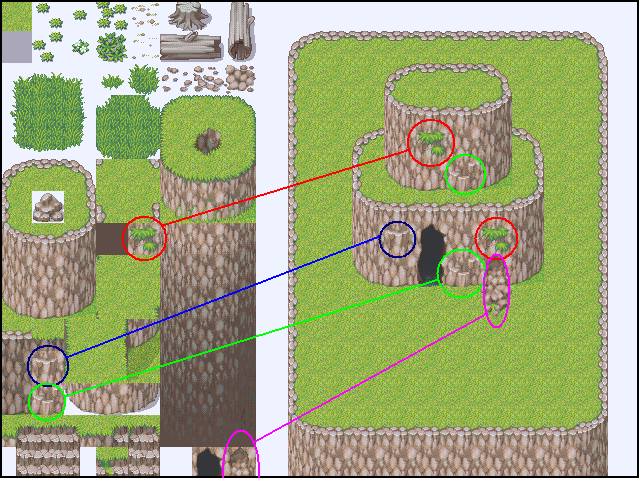
In this picture, I have highlighted several tiles in the tileset that would be used to detail the cliffs. I noticed that a lot of people just had flat cliffs with little/no detail on the sides, so I thought I would point these out.
The trick to placing these tiles is to always remember not to put the same tiles next to each other. Never place 2 of the same tiles next to each other on a cliff, they more often than not will look bad.
If you look at that pic, you might see what I mean. Also, try not to overuse them. 1-2 of each per cliff is usually good
-------------------------
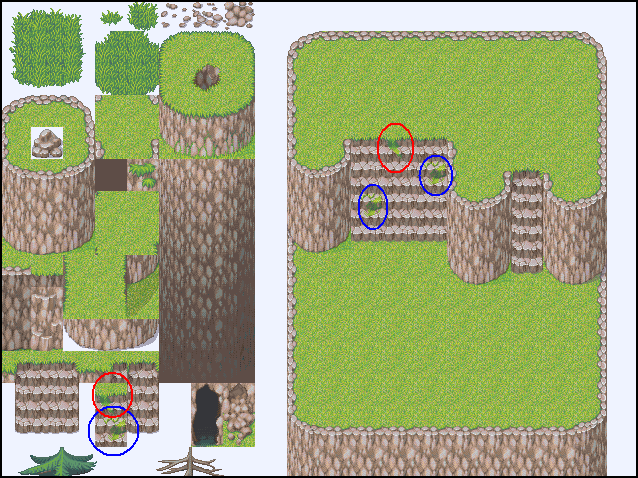
Ahh, stairs. My favorite :p
The trick to make these look good is to indent the cliff on both sides of the stairs like I did in that picture. While this is not always the right way to do it, or quite possibly not even the right way, this is what I do.
It makes the stairs flow a little better with the side of the cliff.
The tiles that I have circled are the stair-detail pieces. As with the cliff detail pieces, try not to place then next to each other. Also, dont overuse them.
--------------------------
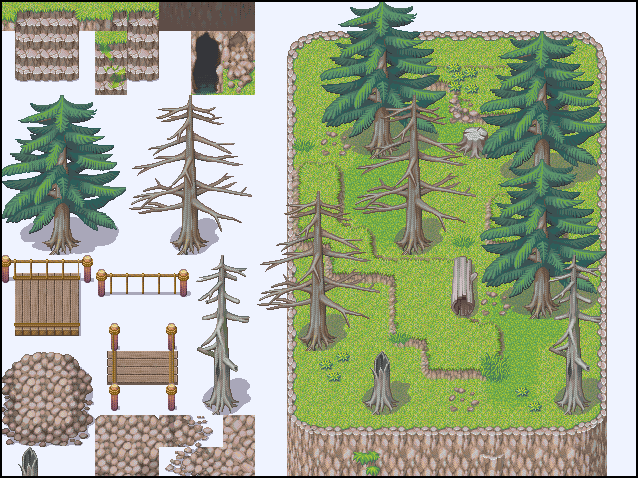
Ahh Trees!
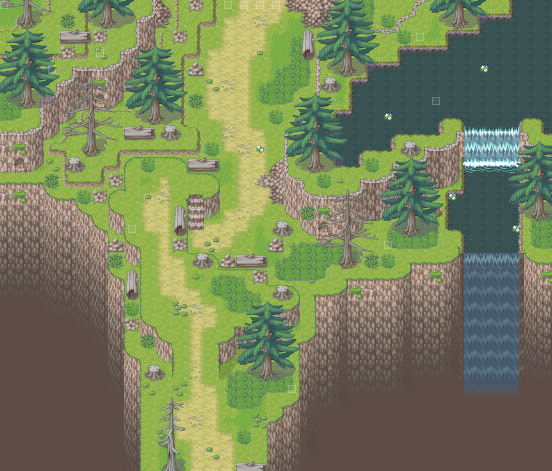
As you can see in this picture, there are a lot of trees and stumps, and logs and grass.
The trick to getting them to pverlap other things (such as the trees being shows over other trees) is to place the bottom tiles of the tree (the bottom 2 rows) in layer 2, and the top 3 rows of the tree in layer 3.
And then remember to turn on the Layer Dim in the Manu (up next to file, in the views pulldown)
With that set, you can see through the trees that are not on that current layer, and therefore place things above and below the trees. Just dont overlap the parts that arent dimmed, or they will dissappear!
------------------------
Now I am going to go through step-by-step on making a map with the mountain tileset.
Please underatand, this map doesnt look very good, but that is because (a) I forgot to switch a autotile out to a different one (the sand-ish tile to a different, dimmer road tile with grass around it) and (b) because I was trying to put in a lot of different tiles so you can see how they can possibly fit into a map.
Okay, here we go!
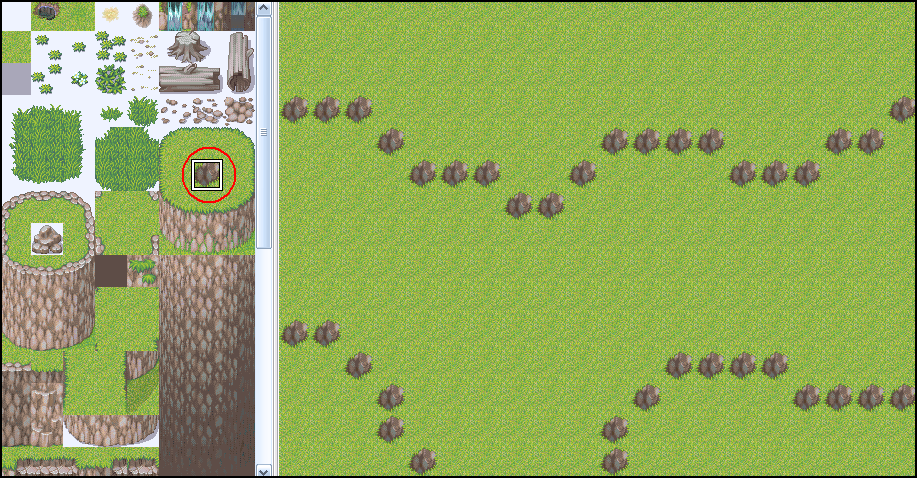
Believe it or not, this is usually how I start cliff mapping. I take a random tile that looks different from the grass, and make the general shape of the mountains that I am going to make. In the case of this picture, there is going to be a road that meets in a "T" junction.
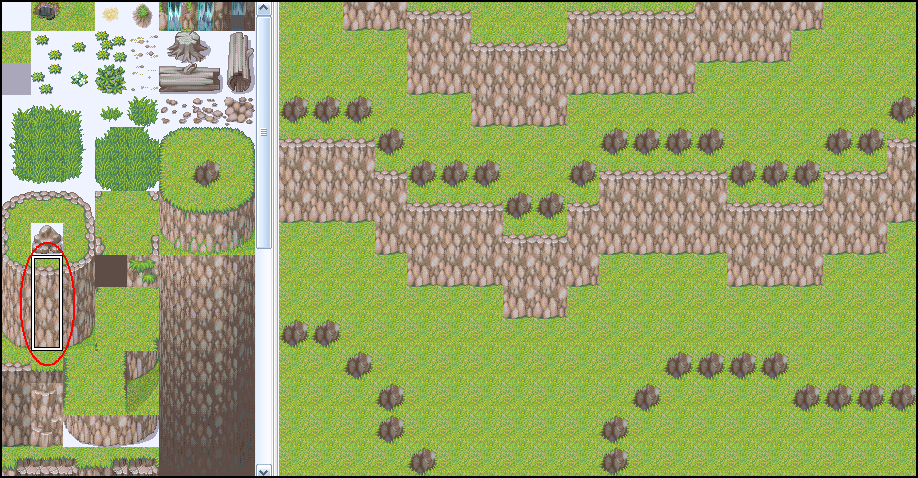
After that, I select the cliff from the tileset by dragging over the whole main part of the cliff (like in the pic) and then placeing it under the design that I already placed out. Dont worry about the curves just yet, those will be covered next.
Also, MAKE SURE YOU ARE DOING ALL OF THIS IN LAYER 1!!!
Layer 1 was made for the ground, and the cliffs and the water and all of that, so use it!
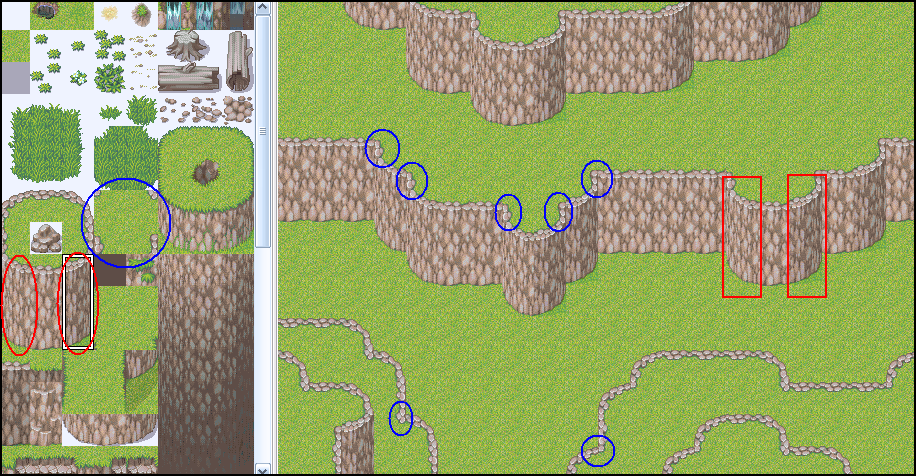
Next, use the curves on all of the corners of the cliff.
In the pic, I also highlighted the corner pieces and where they go (they are circled in blue)
That cliff on the top of the screen is still in mayer 1 also.
Meanwhile, on the bottom, where the cliff overhangs, you have to place those cliff pieces in the second layer, so that they dont have a white box around them. They should be the only things in the second layer.
----------------------------
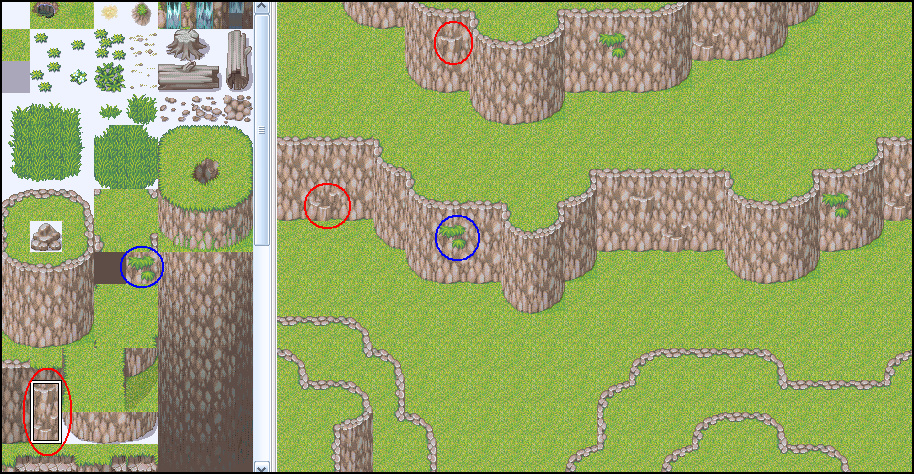
Next detail the cliffs. Remember not to over use the tiles, or place them next to each other.
----------------------------
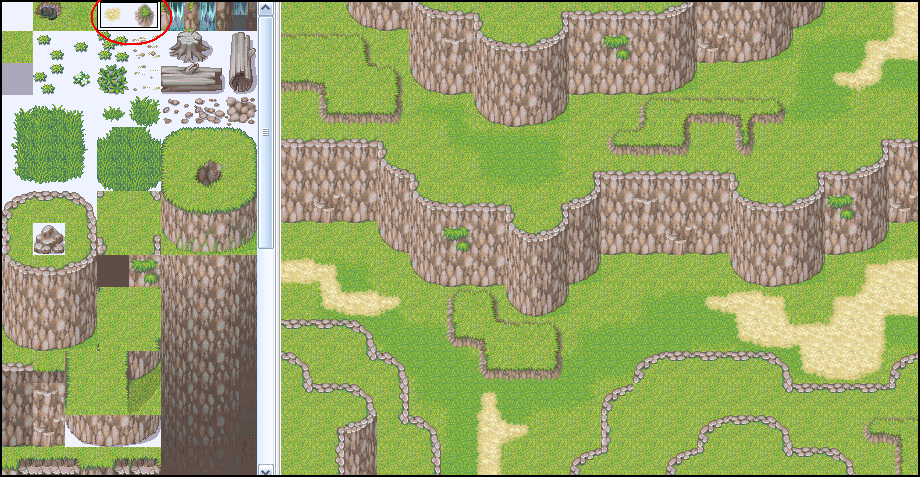
Next, use the autotiles and detail the rest of the ground where cliffs are not present. Try to do as much as you can in the 1st layer, so that you have the other 2 layers free for trees and other details. (the undulation goes on the second layer though)
----------------------------
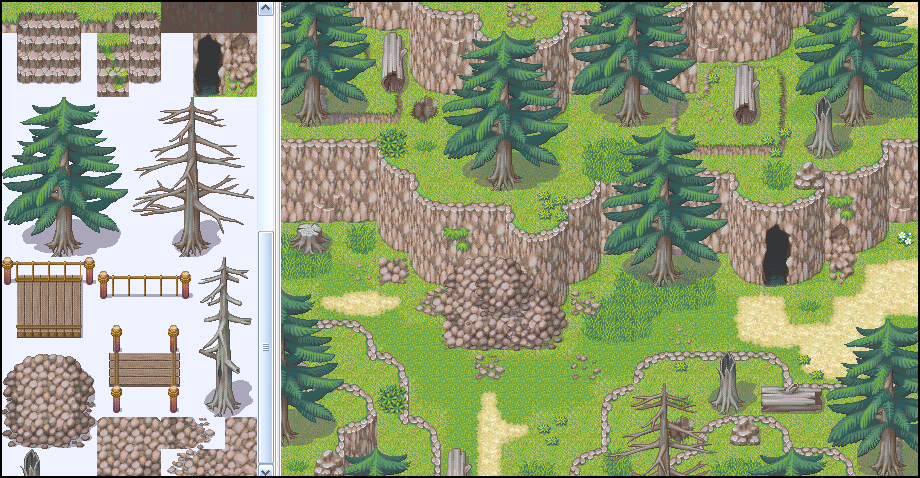
And for the big and final jump, add the trees and details.
Turn on the "Dim inactive layers" option and start in layer 2. Add the bottom 2 layers of the trees wherever other things arent (like the cliffs, or the undulations)
Then in layer 3, add the tops of the trees as well as the details that go ontop of the undulations (such as the dead logs like in the picture)
And there ya go! Not the best map I have ever made (again, that autotile I gorgot to switch but...) but now you know how I go about making maps. Hopefully this helps out a few people.
-------------------------
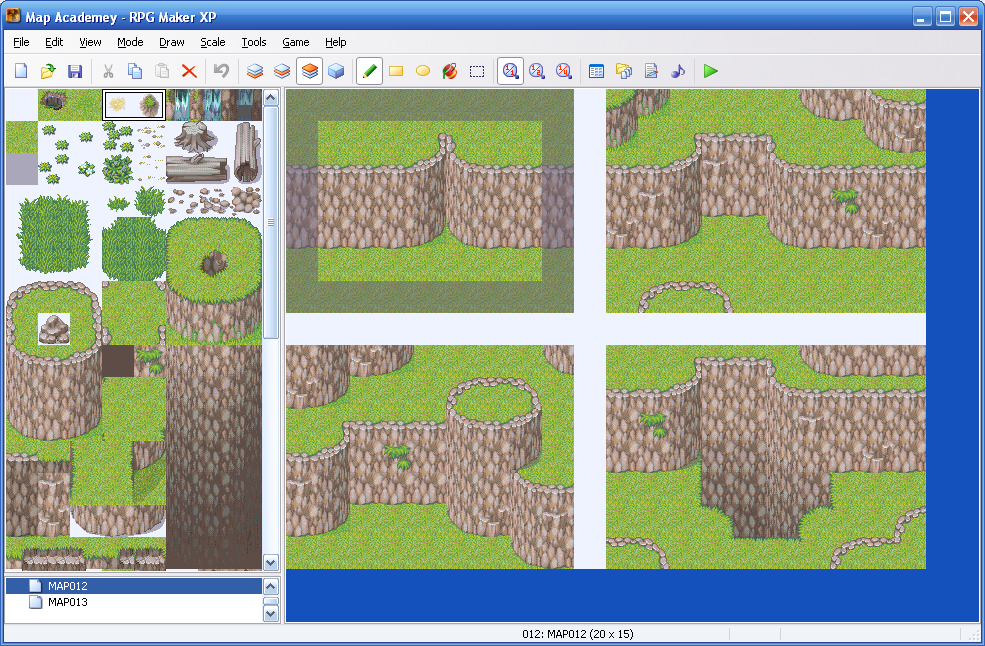
In this image, there are 4 small maps that I have created. the first one (with the dark border) is what not to do. This is a mapping error, and it more often than not looks out of place. Actually look a little like someones behind more than a cliff! ^_^
The map to the right of it is how to properly do indentations, as well as a few details that I added. (all of that is in the 1st layer also)
The other two are several other ways to add detail to cliffs, such as adding the mounts on top of cliffs (remember, this is a video game, not real life. Things like that look good in games)
Anyway, I hope this helps a few people with the next assignment!
Thank you for reading.
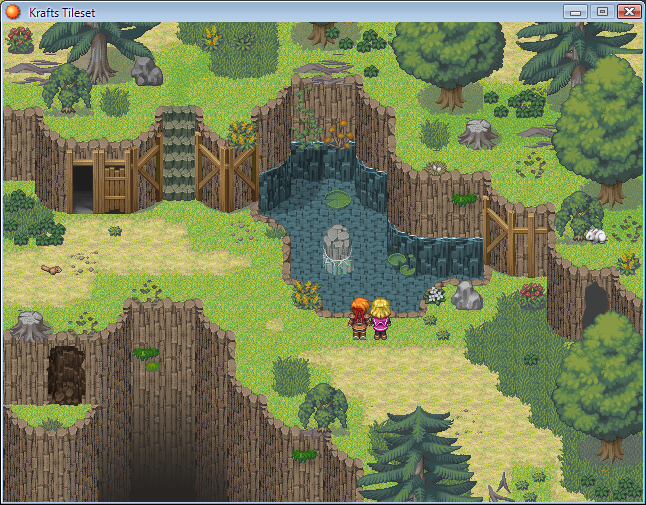
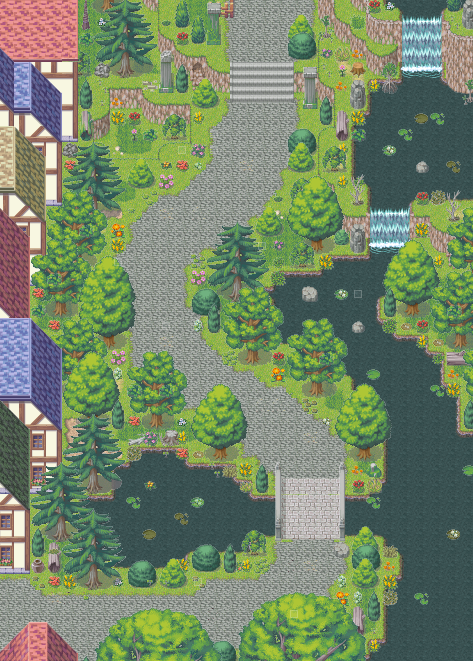
These were all made by me, I am planning to teach how to create a few of these (like the bottom 2) in future lessons.
